
When a wall transforms your yard with raised beams and sheer descents, you create a striking balance of beauty and function. Raised beams highlight specific zones like garden beds, adding contrast and architectural interest, while sheer descents guarantee proper drainage and prevent erosion during heavy rain. These features define levels smoothly, guide movement, and enhance privacy. Understanding when to use them can dramatically elevate your landscape’s appeal—continue exploring to discover how to make these elements work for your space.
Key Takeaways
- Raised beams highlight specific areas, adding architectural interest and defining landscape zones effectively.
- Sheer descents ensure proper drainage, preventing water buildup and reducing erosion risks across yard slopes.
- Combining raised beams with sheer descents enhances both visual appeal and functional water management.
- Proper installation of these features improves yard accessibility, safety, and overall landscape cohesion.
- Thoughtful design integrates beams and descents early, shaping the yard’s visual flow and seamless transitions between levels.
Top picks for "rais beam sheer"
Open Amazon search results for this keyword.
As an affiliate, we earn on qualifying purchases.
Understanding the Role of Elevation in Landscape Design
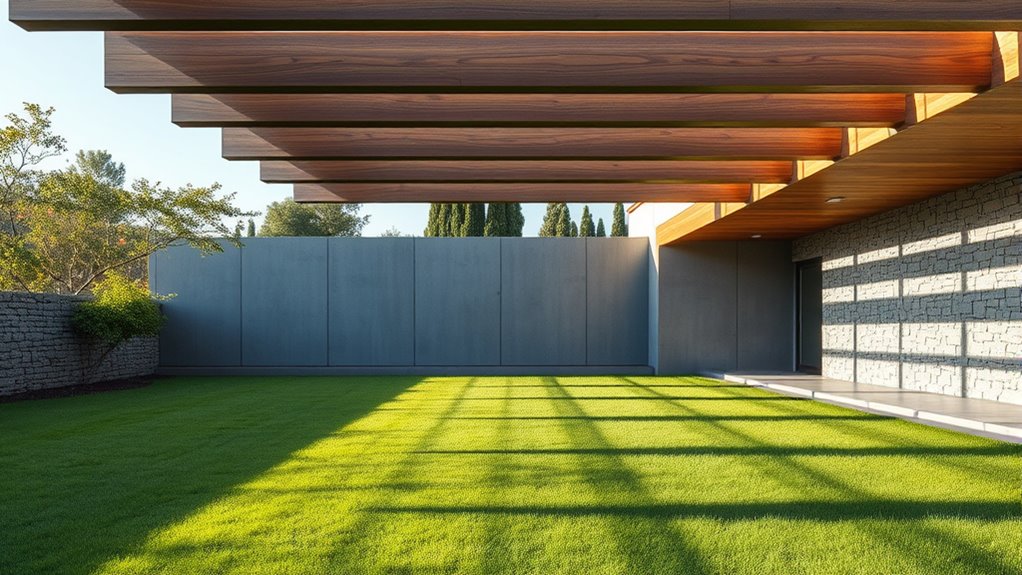
Elevation plays a crucial role in shaping the overall aesthetic and functionality of your landscape. It creates visual interest by adding depth and dimension, making your yard feel more dynamic. By adjusting elevation, you can highlight focal points like trees, sculptures, or water features, drawing attention where you want it most. Elevated areas can serve practical purposes, such as preventing water runoff or controlling soil erosion. They also help define different zones within your landscape, giving you a sense of structure and organization. Proper elevation changes can make pathways more inviting and accessible, guiding visitors seamlessly through your yard. Incorporating natural materials like stone and wood enhances the authentic feel of your landscape design. Ultimately, understanding how elevation impacts your landscape allows you to design a space that’s both beautiful and functional, tailored to your specific needs.
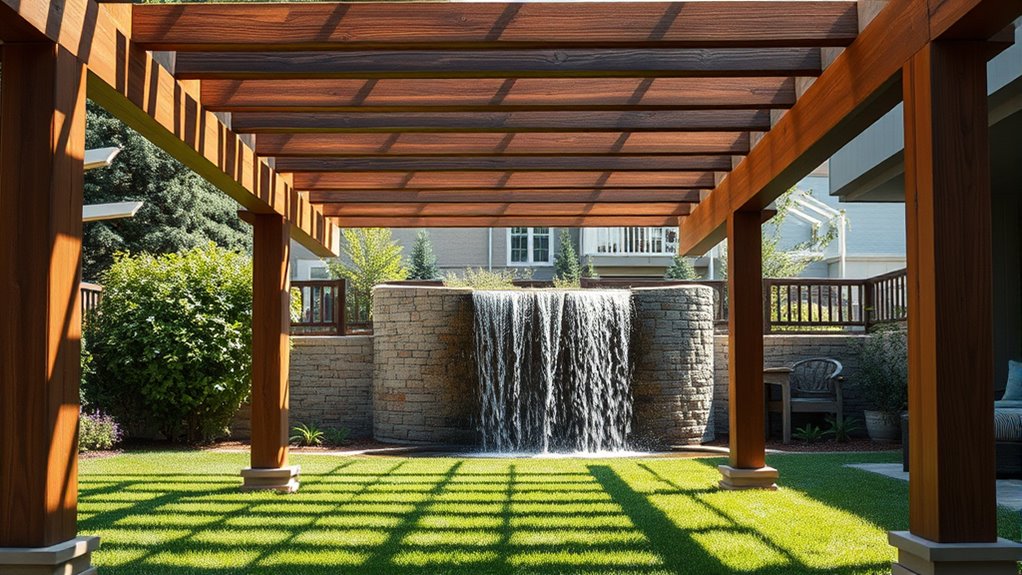
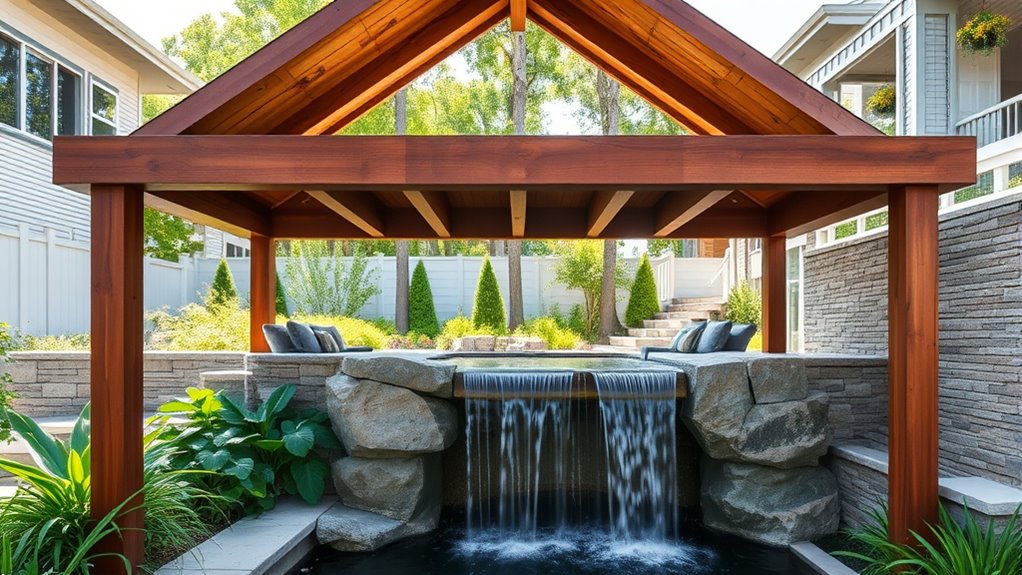
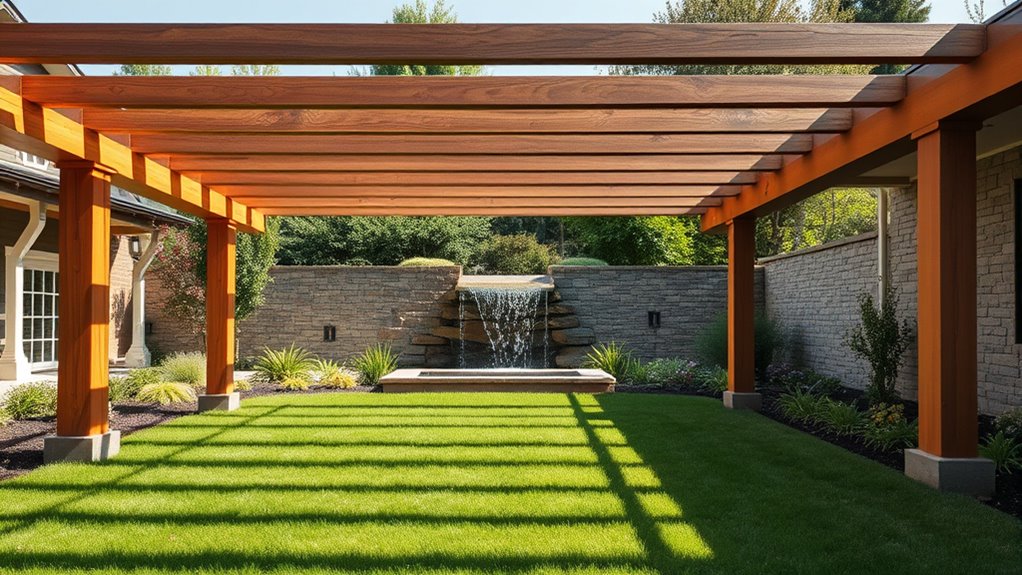
When to Use Raised Beams for Visual Impact
Raised beams are a powerful tool for creating striking visual features in your landscape when used strategically. You should consider using them when you want to draw attention to specific areas, like garden beds or pathways, adding depth and dimension. They work well to highlight focal points or create contrast against lower surfaces, making your yard feel more dynamic. Raised beams also help define separate zones, giving your landscape a layered, sophisticated look. Use them when you want to add architectural interest without overwhelming the space. Keep in mind, their visual impact is most effective when paired with simple, clean lines that complement your overall design. Timing matters—install raised beams early in your project to shape the visual flow from the start. Additionally, understanding regional landscape trends can help you choose styles that enhance your yard’s appeal.
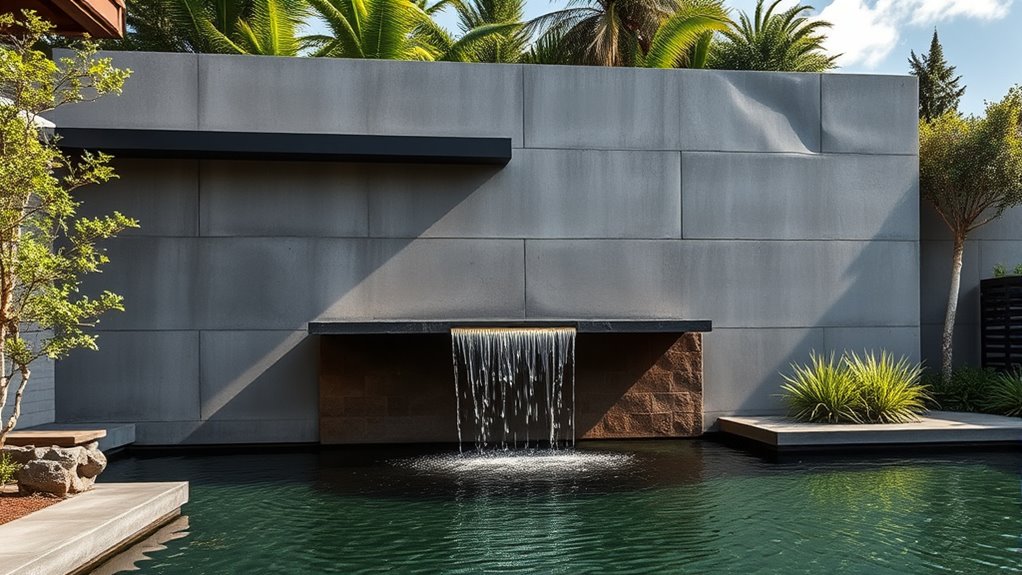
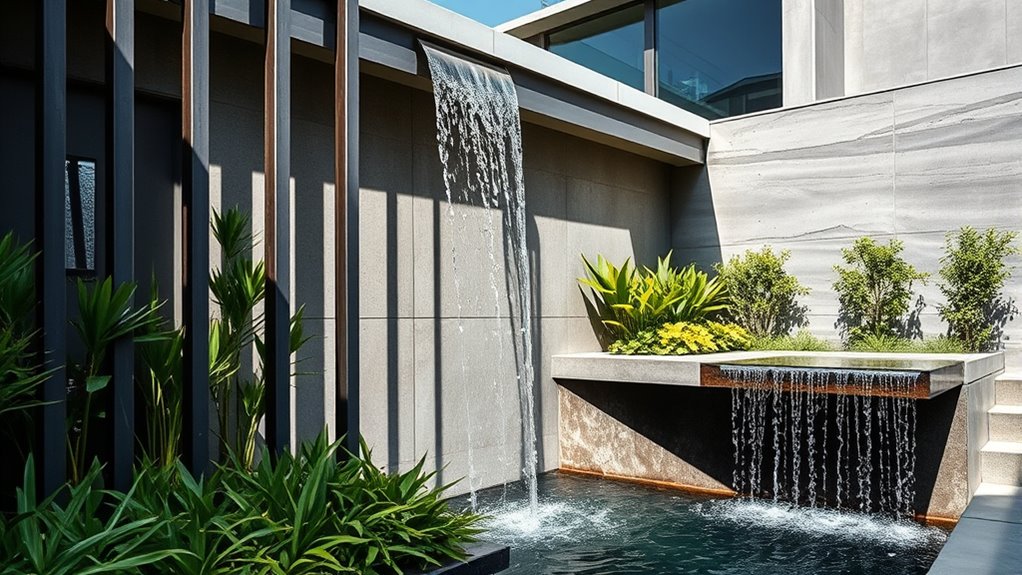
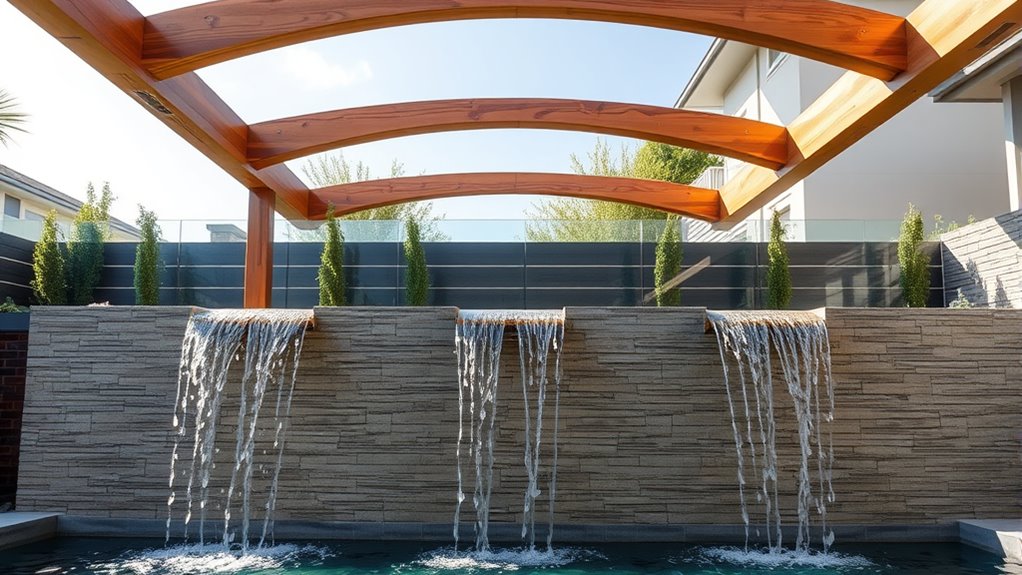
Incorporating Sheer Descents for Functional Drainage

To guarantee effective drainage, you need to focus on proper slope installation and drainage channel design. These elements prevent water buildup and direct runoff away from your structure. Regular maintenance also keeps the sheer descents functioning smoothly over time. Additionally, considering the contrast ratio of your drainage system can help improve visual clarity and ensure consistent water flow during heavy rainfall.
Proper Slope Installation
Ensuring proper slope installation is essential for effective drainage when incorporating sheer descents into your design. You need to establish a consistent, gentle slope—typically between 1% and 2%—to allow water to flow naturally without pooling. Use a level or laser tool to confirm the slope during installation, checking that the descent gradually directs water away from structures and toward drainage points. Avoid flat sections that can cause standing water or steep inclines that increase erosion risks. Adjust the height and angle of the sheer descent accordingly, making sure the slope remains steady from start to finish. Proper slope installation ensures your drainage system functions smoothly, preventing water damage and maintaining the integrity of your yard’s landscape. Additionally, understanding the importance of correct grading can help prevent future drainage issues and costly repairs.
Drainage Channel Design
Designing a drainage channel that effectively directs water requires careful planning of sheer descents within the system. You need to guarantee these descents create a smooth, continuous slope that guides water away from your yard without pooling. Start by analyzing the terrain to determine the ideal points for shear descents, which act as controlled drops to maintain flow velocity. Incorporate gentle slopes that match the natural grade, preventing erosion or stagnation. Use durable materials like concrete or stone to withstand weather and flow pressure. Position the descents strategically to connect high points with lower drainage outlets, ensuring water moves swiftly and efficiently. Properly designed shear descents help prevent flooding, protect landscaping, and maintain functional drainage throughout your yard.
Maintenance Considerations
Regular maintenance of shear descents is essential to keep your drainage system functioning properly. You should regularly inspect the channels for debris, leaves, and sediment buildup that can block water flow. Clearing obstructions promptly prevents backups and flooding. Check for signs of erosion or damage to the concrete or surrounding materials, and repair any cracks or deterioration to maintain structural integrity. Ensure that the slope remains correct; improper grading can cause water to pool instead of drain away. Keep the outlet clear of obstructions that could prevent water from exiting efficiently. Periodic cleaning with a hose or pressure washer helps remove stubborn dirt and debris. Understanding drainage system design can help you identify potential issues before they become serious. Consistent upkeep guarantees your shear descent continues to provide effective, functional drainage and protects your yard from water damage.
Materials and Techniques for Building Elevated Walls
Building elevated walls requires selecting durable materials and applying techniques that guarantee stability and safety. You’ll want to choose strong materials like reinforced concrete, steel, or treated timber depending on your design and climate. Reinforced concrete offers longevity and excellent load-bearing capacity, while steel provides flexibility and strength. Treated timber is suitable for lighter walls and adds a natural aesthetic. When constructing, ensure proper foundation preparation, such as deep footings for stability. Use formwork carefully to shape the wall, and incorporate reinforcement like rebar to prevent cracking. Proper curing is vital for concrete, and precise alignment guarantees safety and durability. Additionally, proper drainage systems are essential to prevent water buildup that could compromise wall integrity. By combining quality materials with meticulous techniques, you create elevated walls that stand strong and enhance your yard’s visual appeal.
Designing Seamless Transitions Between Levels
When creating progressions between levels, focus on making changes gradual to keep the flow smooth. Use consistent materials and colors to help different sections feel connected. Incorporate visual cues like alignment and detailing to seamlessly unify the design. Additionally, considering skincare ingredients like glycolic acid can enhance the overall aesthetic by promoting healthy, radiant skin that complements the natural transition of spaces.
Gradual Level Changes
Creating seamless progressions between different levels in your design involves carefully planning gradual changes that feel natural and safe. You can achieve this by using gentle slopes, wide stairs, or ramps that blend smoothly into surrounding surfaces. Consider the terrain and how people will move through the space, ensuring connectivity are accessible and comfortable. Avoid abrupt drops or sudden steps that disrupt flow or pose safety risks. Incorporate subtle changes in elevation with consistent gradients, making the change almost imperceptible. Use landscaping features, retaining walls, or built-in edging to guide the eye and reinforce the link. Additionally, employing gradual level changes helps to create a more inviting and harmonious outdoor environment. By thoughtfully designing these gradual shifts, you create a cohesive outdoor environment that invites exploration and enhances functionality without sacrificing aesthetic appeal.
Consistent Material Transitions
To facilitate seamless progression between levels, selecting consistent materials plays a vital role in unifying different surfaces and structures. Using similar materials helps create visual harmony and reduces the sense of disjointed transitions. It encourages the eye to flow naturally from one area to the next, making changes feel intentional rather than abrupt. Incorporating knowledge of security assessments can also inspire thoughtful material choices that enhance durability and safety in outdoor or structural designs.
Visual Integration Techniques
Seamless visual flow between levels relies heavily on effective design strategies that unify different surfaces. To achieve this, use consistent color palettes, textures, and materials across *connections*. Incorporate matching or complementary edging and trim to create cohesion. Gradual slope changes or integrated ramps soften abrupt shifts, guiding the eye naturally. Lighting also plays a key role; uniform or layered lighting highlights connections and reduces visual clutter. Here’s a quick visualization:
| Level 1 Surface | Level 2 Surface |
|---|---|
| Natural stone | Brick pavers |
| Wooden deck | Gravel pathway |
| Grass | Mulched bed |
| Concrete slab | Stepping stones |
| Retaining wall | Planter wall |
This approach *guarantees* your yard feels unified, inviting, and visually balanced across different heights.
Enhancing Privacy and Security With Wall Modifications
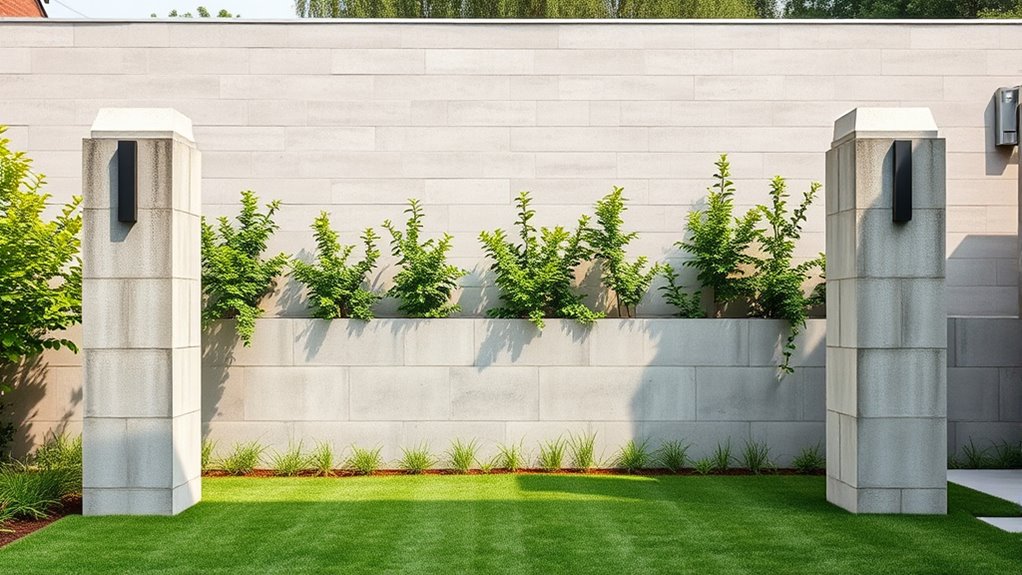
Enhancing privacy and security often starts with thoughtful wall modifications that serve both functional and aesthetic purposes. You can boost your yard’s safety by adjusting wall heights or adding features that deter unwanted visitors. For example, consider:
Thoughtful wall modifications enhance privacy, security, and aesthetic appeal for your yard.
- Increasing wall height for more seclusion
- Installing spiked or textured tops to prevent climbing
- Adding security cameras or lighting along the wall
- Incorporating locking gates for controlled access
These modifications make it harder for intruders to breach your space while maintaining visual appeal. Reinforcing weak points or extending existing walls also helps create a clear boundary, reducing the risk of unauthorized entry. Customizing your wall to balance privacy and security ensures your yard feels safe without sacrificing style or openness where you want it. Additionally, wall sanitization helps maintain the integrity and safety of your security features over time.
Combining Aesthetic Appeal With Structural Stability

Achieving a balance between aesthetic appeal and structural stability requires thoughtful design choices that complement each other. You want your yard to look attractive while ensuring safety and durability. Start by selecting materials that are both strong and visually pleasing, like natural stone or decorative concrete. Incorporate design elements—such as textured surfaces or color accents—that enhance the wall’s appearance without compromising its strength. Pay attention to proportions and scale to create visual harmony. Structural reinforcement, like hidden steel supports or proper footing, guarantees stability over time. When these elements work together, your wall becomes a striking feature that also stands the test of time. The key is blending beauty with function, so your yard remains both inviting and secure.
Common Challenges and How to Overcome Them
Building raised beams and sheer descents can present several challenges, from soil instability to material selection issues. You might face difficulties guaranteeing proper support and preventing shifting over time. Weather conditions can also impact construction, causing delays or damage. Additionally, choosing the right materials is vital to prevent cracking or deterioration.
To overcome these challenges, consider:
- Conducting thorough soil testing before starting
- Using reinforced concrete or treated lumber for durability
- Installing proper drainage systems to prevent water damage
- Consulting with professionals for structural guidance
Addressing these issues early helps create a safe, long-lasting yard transformation. Staying proactive ensures your project remains on track and meets your aesthetic and functional goals.
Tips for Planning Your Yard Transformation Project
Planning your yard transformation carefully can make all the difference between a project that runs smoothly and one filled with unexpected setbacks. Begin by setting clear goals and prioritizing your needs, whether it’s creating more privacy, adding seating, or improving drainage. Develop a realistic budget that includes materials, tools, and professional help if needed. Measure your space precisely and create detailed plans or sketches to visualize the final result. Obtain necessary permits early to avoid delays. Consult with experts or experienced friends to identify potential challenges and solutions. Schedule your project during favorable weather and break it into manageable phases. Staying organized, flexible, and proactive will help you stay on track and turn your yard into a beautiful, functional space.
Frequently Asked Questions
How Do I Choose the Right Height for My Raised Beams?
You should choose the height of your raised beams based on their purpose and your aesthetic preference. Consider how you’ll use the space—if you want to define a seating area or showcase plants, opt for a height that provides visual interest without overwhelming. Usually, a height of 18-24 inches works well. Measure the area, think about proportion, and select a height that balances functionality with your yard’s overall design.
Are There Specific Regulations for Building Sheer Descents?
Yes, there are specific regulations for building sheer descents. You should check local building codes and zoning laws, which often specify maximum slope angles, safety features, and landings. It is crucial to obtain any necessary permits before construction. Consult with your local building authority or a licensed engineer to ensure your project complies with all safety standards and regulations, preventing potential fines or safety hazards.
What Maintenance Is Required for Elevated Yard Walls?
Think of your elevated yard wall as a living garden needing regular care. You should inspect it monthly for cracks, loose bricks, or signs of shifting. Clean the surfaces to prevent moss or mold buildup. Check drainage around the base to avoid water damage. Trim nearby plants to prevent roots from causing structural issues. Regular maintenance keeps your wall strong, beautiful, and a reliable part of your outdoor landscape.
Can These Designs Be Adapted for Uneven Terrain?
Yes, you can adapt these designs for uneven terrain. You’ll need to work closely with a structural engineer or landscape designer to assess the slope and plan appropriate supports. Using adjustable footing systems or terraced layers helps create a stable, attractive wall that follows the land’s natural contours. Proper drainage and foundation adjustments are key to ensuring long-term stability and safety on uneven ground.
How Do I Ensure Safety Around Elevated and Sheer Wall Features?
You guarantee safety around elevated and sheer wall features by installing sturdy railings and barriers, making sure they’re high enough and secure. Use slip-resistant surfaces on paths and steps to prevent falls. Clearly mark edges with bright paint or lighting, especially at night. Regularly inspect the structures for stability and damage. Educate everyone about potential hazards, and keep children supervised near these features to prevent accidents.
Conclusion
Transforming your yard with raised beams and sheer descents is like sculpting a landscape masterpiece—each element working together to elevate your outdoor space. By understanding their roles and carefully planning your project, you’ll create a seamless blend of beauty and function. Embrace the process, and soon your yard will stand tall and flowing, a living work of art where every level invites you to explore and enjoy.