
Your pool build starts with planning and permits, which can take a few weeks. Then, excavation and base preparation happen swiftly, followed by installing the pool structure, whether fiberglass or concrete. Next, plumbing and electrical systems are set up, and the interior surface is finished and sealed. Filling and testing the pool complete the process, usually within a month or so. Keep going to learn more about each step’s timeline and key details.
Key Takeaways
- Planning and permitting typically take several weeks to secure approvals and finalize project details.
- Excavation and base preparation usually span 1 to 2 weeks, including soil leveling and drainage setup.
- Installing the pool structure generally requires 1 to 2 weeks, depending on material type and complexity.
- Plumbing, electrical, and equipment setup often takes 1 to 2 weeks for proper installation and connection.
- Interior finishing and surface application generally require 1 to 2 weeks, including curing and final inspections.
Planning and Permitting Phase

The planning and permitting phase is the crucial first step in building your pool, as it sets the foundation for the entire project. During this stage, you’ll determine your pool’s size, shape, and features, aligning them with your yard and budget. You’ll also need to research local regulations and zoning laws to ensure your plans are compliant. Securing permits involves submitting detailed plans to your city or county, which can take several weeks. It’s essential to communicate clearly with contractors and authorities to avoid delays. This phase also involves finalizing contracts and budgets, so you’re prepared for the work ahead. Proper planning and permitting prevent surprises later, giving your project a smooth start and ensuring your dream pool becomes a reality within your timeline. Understanding local building codes and permit requirements is vital to ensure safety and compliance.
Excavation and Base Preparation

After finalizing your plans and securing permits, the next step is to begin excavation and base preparation. You’ll start by marking the pool’s outline on the ground, guaranteeing measurements are precise. Using heavy machinery, you’ll excavate the site to the required depth, removing soil and debris. Once the hole is excavated, you’ll prepare the base by leveling and compacting the soil to create a stable foundation. This step is vital to prevent shifting or cracking later. You may need to add a layer of gravel or sand for added stability and drainage. Proper excavation and base prep set the stage for the pool’s structure, so take your time to do it right. Accuracy now guarantees a smoother installation process down the line. Incorporating proper geotechnical assessment ensures the soil conditions support the stability needed for a long-lasting pool.
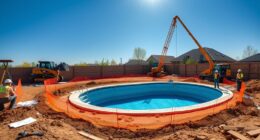
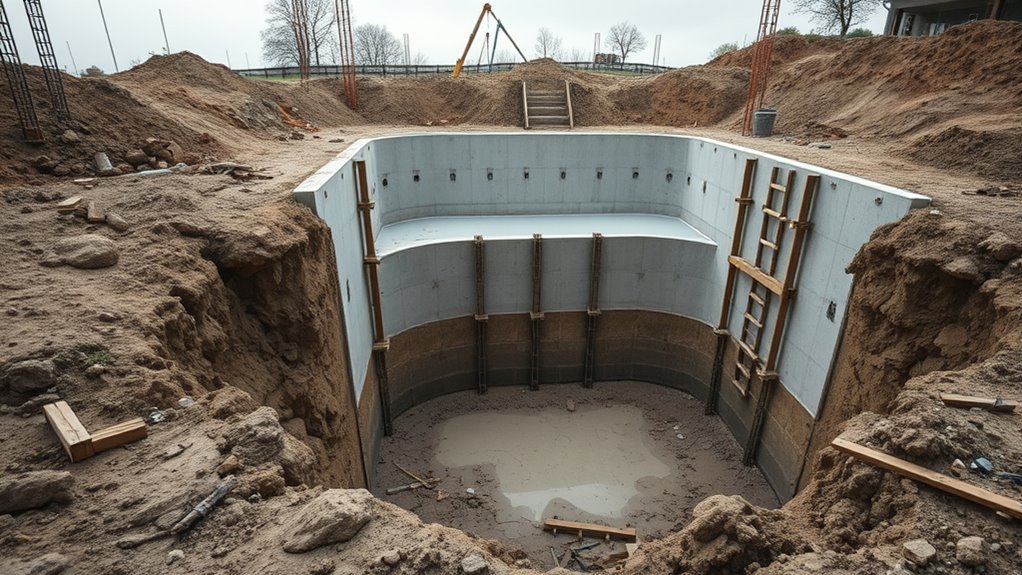
Pool Structure Installation
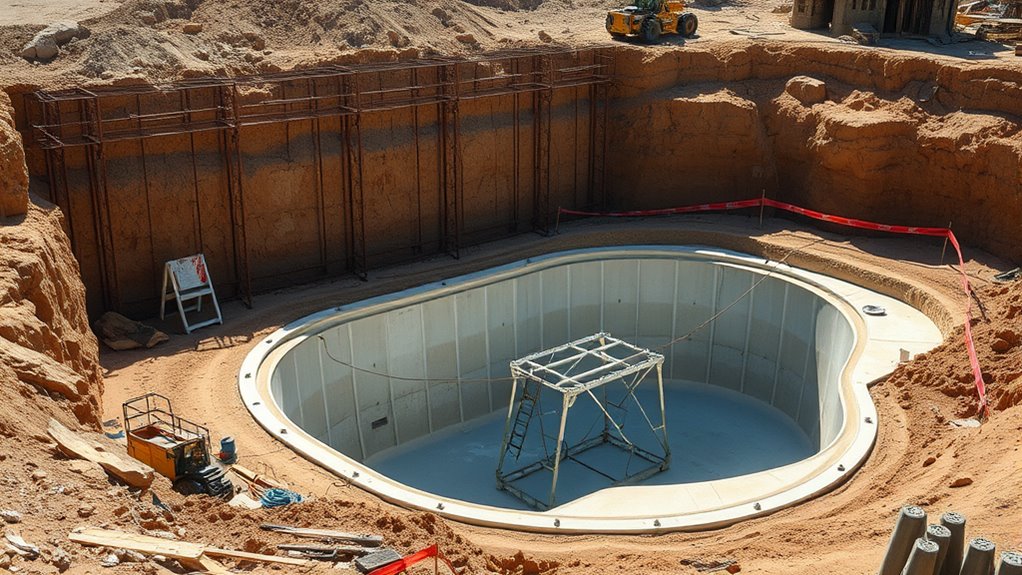
Once the excavation and base are ready, you can begin installing the pool structure. This step involves setting the pool walls and floor, which are typically made of steel, polymer, or fiberglass. You’ll position the panels carefully, making sure they’re aligned and securely connected. For in-ground pools, steel rebar may be added inside the walls for extra strength before pouring concrete or shotcrete. For fiberglass pools, the prefabricated shell is lowered into the excavated hole. During installation, you’ll check for levelness and proper fit, making adjustments as needed. Once the shell or panels are in place, the structure is stabilized, and any gaps are sealed. This phase is vital to guarantee a sturdy, leak-proof pool that will last for years. Proper structural support during installation ensures the longevity and safety of your pool.
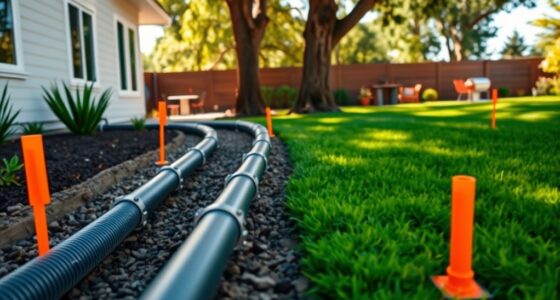
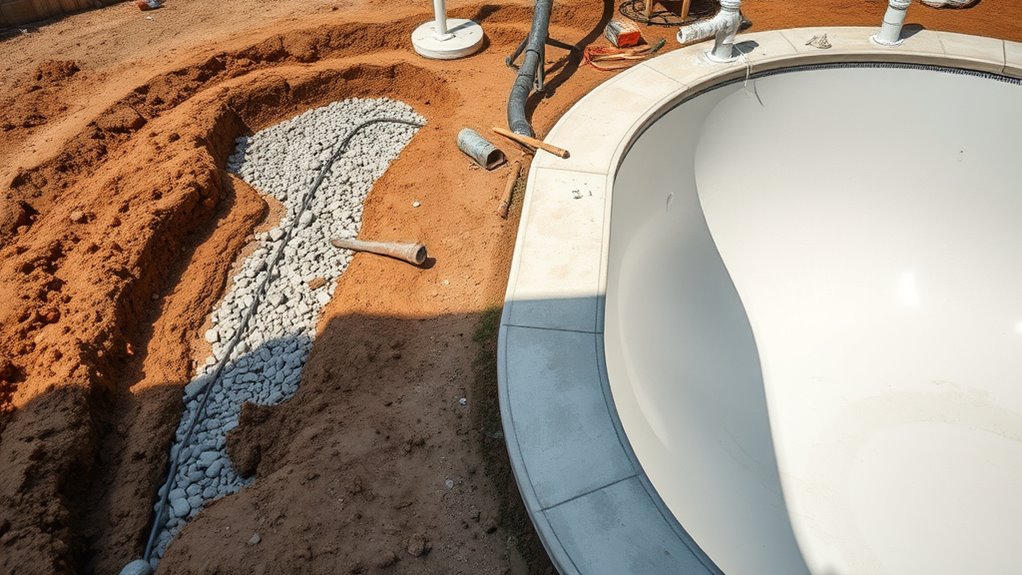
Plumbing, Electrical, and Equipment Setup

As the structure is being secured, you’ll begin installing the essential plumbing, electrical systems, and equipment that make your pool functional and safe. You’ll lay out pipes for water circulation, connect the pump and filter, and ensure proper drainage. Simultaneously, wiring runs from your electrical panel to power the pump, lighting, and controls. Precision is key to avoid leaks or electrical hazards. Visualize this:
| Components | Function |
|---|---|
| Pump and Filter | Circulate and clean water |
| Return Jets | Distribute filtered water |
| Electrical Wires | Power lights and pump |
| Drain Valves | Remove excess water |
This setup forms the backbone of your pool operation, ensuring everything runs smoothly once filled. Proper ventilation considerations are also essential to maintain safe air quality around your equipment.
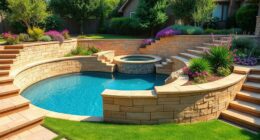
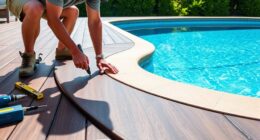
Interior Finishing and Surface Application
Once the structural work is complete, you’ll focus on preparing the pool surface to guarantee the finish adheres properly. Proper surface preparation techniques are vital for a smooth, durable finish. Using the right surface prep tools ensures even coverage and minimizes defects. Afterward, you’ll apply final surface coatings that give your pool its appearance and longevity.
Surface Preparation Techniques
To guarantee a smooth and durable finish, proper surface preparation is essential before applying interior coatings or finishes to your pool. First, ensure the surface is thoroughly cleaned to remove dirt, debris, and oils that could hinder adhesion. Second, inspect for any cracks, chips, or imperfections, then repair these areas with suitable patching compounds. Third, sand the surface using a medium-grit abrasive to create a rough texture, which helps the coating bond better. Be sure to rinse off any dust and allow the surface to dry completely. Proper preparation minimizes future issues like peeling or cracking, ensuring your pool’s interior remains beautiful and long-lasting. Taking these steps carefully sets a solid foundation for the final surface application. Additionally, understanding surface preparation techniques can further enhance the durability of your interior finish.
Final Surface Coatings
After completing surface preparation, applying the final coatings brings your pool’s interior to life. You’ll choose between options like plaster, pebble, or tile, depending on your desired look and durability. Proper application is vital; ensure the surface is clean, dry, and free of debris. Use professional-grade tools and follow manufacturer instructions for mixing and curing times. Apply the coating in smooth, even layers to avoid streaks and imperfections. Multiple coats may be necessary for a consistent finish. Once the coating cures fully, it creates a waterproof, smooth surface that’s both attractive and functional. This step truly transforms your pool from a shell into a pristine, inviting oasis ready for water. Proper attention here guarantees longevity and aesthetic appeal.
Filling, Testing, and Final Inspection
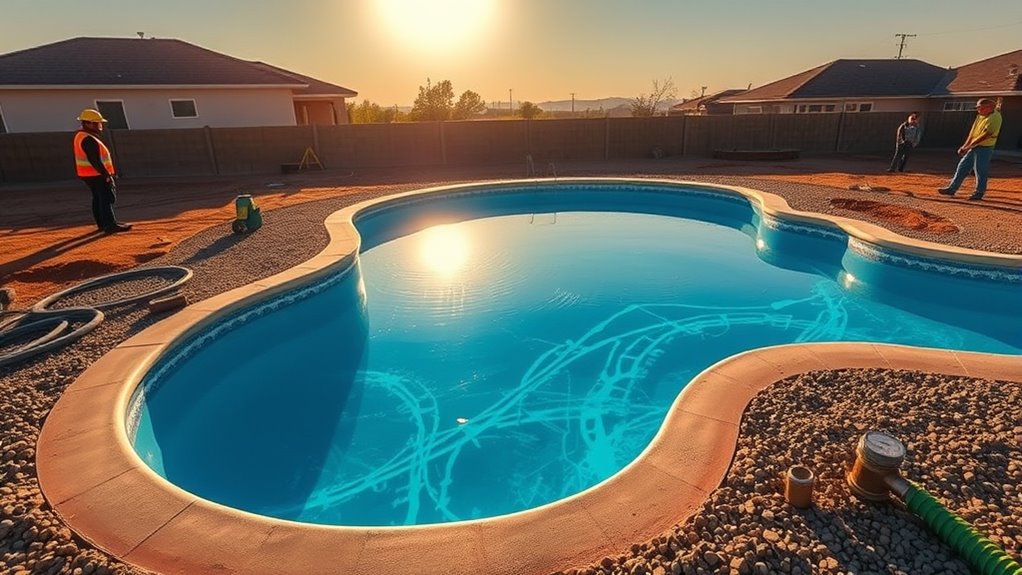
Filling the pool with water marks a crucial step, as it allows you to verify that the structure holds water without leaks. Once filled, you’ll need to:
- Monitor for leaks: Check around fittings and seams for water loss.
- Test equipment: Run the pump, filter, and heaters to ensure all systems function properly.
- Inspect for issues: Look for cracks, loose fittings, or uneven surfaces that may need attention.
- Ensure proper water circulation to prevent stagnation and maintain water quality.
During this process, keep a close eye on water levels and system performance. If leaks or malfunctions occur, address them before proceeding. Once everything checks out, you’re ready for the final inspection, which confirms your pool is safe, functional, and ready for the first swim.
Frequently Asked Questions
How Long Does It Typically Take to Finalize Pool Design Choices?
You can usually finalize your pool design choices within a few weeks, depending on how quickly you decide on features and materials. It’s important to communicate clearly with your contractor and gather inspiration early. Allow extra time for revisions or if you need to source specific materials. Staying organized and making decisions promptly helps guarantee your project stays on track, so you can enjoy your pool sooner.
What Are Common Delays During the Excavation Process?
Delays during excavation can feel like hitting a pothole on a smooth road. Common culprits include unexpected underground obstacles like rocks or tree roots, which slow down progress and require extra equipment or manual labor. Weather also acts like a mischievous tempter—heavy rain or storms can halt work entirely. Miscommunications between contractors or permit issues can add unexpected detours, turning a straightforward job into a waiting game.
How Much Does Pool Construction Usually Cost?
Pool construction typically costs between $35,000 and $65,000, but this varies based on size, materials, and features. You might spend more if you opt for custom designs, high-end finishes, or additional features like waterfalls and lighting. Keep in mind that unexpected delays or permit issues can increase costs. It’s wise to set aside a contingency fund of around 10-15% to cover unforeseen expenses during the build.
Can a Pool Be Built in Winter or Off-Season?
Building a pool in winter is like planting seeds in cold soil—you can do it, but it’s trickier. Off-season construction is possible, and you might find better deals or quicker scheduling since fewer projects compete for resources. Just keep in mind that colder weather can slow down curing times and complicate certain tasks. With proper planning and experienced contractors, you can still enjoy your pool’s first splash come summer.
What Maintenance Is Required Immediately After Installation?
Right after installing your pool, you should balance the water chemistry by testing and adjusting pH, alkalinity, and chlorine levels. Run the pump continuously for at least 24 hours to circulate chemicals and prevent algae growth. Clean the filters and skim debris from the surface regularly. Also, inspect all equipment to guarantee everything functions properly. These steps help keep your pool clean, safe, and ready for your first swim.
Conclusion
By following each step carefully, you’ll find that the timeline aligns unexpectedly smoothly, making the process feel almost effortless. It’s ironic how, with a little planning, your dream pool can come to life just as you envisioned—bringing it all together seamlessly. When the first splash finally happens, you’ll realize that patience and precision turned what seemed like a coincidence into a beautifully crafted reality. Now, your backyard’s perfect oasis is just a swim away.